Biosensors and How They Work

In this story
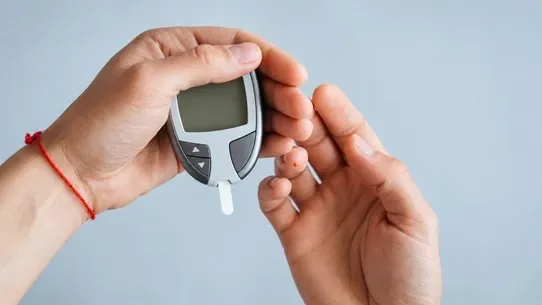
A biosensor is a device that uses a biological component to recognize a target and converts that interaction into a measurable signal. A blood glucose meter is a familiar example. An enzyme in many glucose test strips reacts with glucose in a drop of blood, and the meter uses the resulting electrical signal to estimate its concentration. Other biosensors register changes in light or vibration instead. IUPAC’s biosensor definition.
Biosensors can produce a number, a visible line, or a series of readings over time. To understand what any of those results means, start by asking what the device detects and where the sample comes from. Two devices can both show “glucose” while sensing it in different fluids and at different times.
What makes a sensor a biosensor?
In the analytical sense used here, the defining part is the biological recognition element. It might be an enzyme that reacts with a substance or an antibody that binds to it. The substance being measured is the analyte. The transducer turns the reaction or binding into something a device can register, such as a change in current or light. A readout then converts or presents that signal as a result.
The word “biosensor” is also used more broadly for devices that track signals from the body. A smartwatch that reads pulse from reflected light is a physiological sensor. It doesn’t need an enzyme or antibody to do that. A pressure sensor in an electric toothbrush is a simpler boundary case. It responds to force on the brush head, even if you press it against something other than a tooth.
A biosensor’s recognition element is only one part of the measurement. The device still has to handle background signal, variation between samples, and drift over time. A display that reports a number to several decimal places shows its display increment, while evidence from a suitable comparison tells you how accurate that number is.
Related Posts:
How biosensors turn a sample into a reading
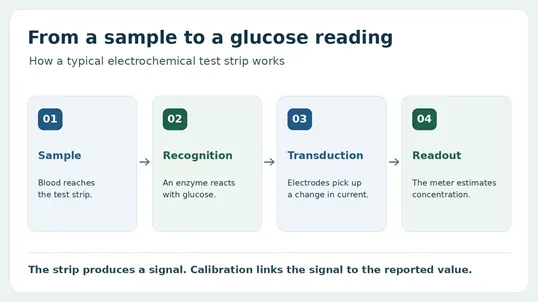
In many finger-stick systems, a disposable test strip contains the enzyme and electrodes. The strip senses the sample and the reusable meter reads the signal. The chemistry responds to glucose, while calibration relates the electrical response to a concentration. The result describes the sample used for that test. FDA guide to blood glucose meters and test strips.
Types of biosensors by signal
Signal | What changes | Example |
Electrochemical | The chemistry changes an electrical property such as current. | An enzyme-based glucose test strip and meter. |
Optical | A reaction produces a visible color or changes the way light behaves. | A visible line on a home pregnancy test that detects hCG. |
Mechanical or acoustic | Material binding to a surface changes how that surface vibrates. | A quartz crystal microbalance used to study molecular binding. |
The signal is only one way to classify a sensor. Researchers may also group devices by what does the recognizing, such as an enzyme or an antibody, or by how the sample is collected. An optical sensor can detect a simple yes-or-no result or measure how strongly molecules bind in a lab instrument. FDA’s home pregnancy test guide and a quartz crystal biosensor study.
A positive-or-negative test uses a threshold. A quantitative sensor estimates how much of the target is present within a specified range. For a threshold test, ask what happens close to the cutoff. For a quantitative test, ask how far readings tend to stray from a reference across the whole range, including the low and high ends.
A reading has a time as well as a value
Response time describes how quickly the sensor reacts to a change. Sampling or reporting interval describes how often the system takes or displays a reading. A phone app that refreshes every minute can still show a signal that responds slowly. If you are comparing a wearable with a reference device, check whether the timestamps align and whether the app shows fresh data, a delayed upload, or a value it carried forward.
Wearable biosensors and what they can measure
Continuous glucose monitors sample fluid under the skin
A typical continuous glucose monitor, or CGM, uses a small sensor under the skin. It senses glucose in interstitial fluid, the fluid surrounding cells, and software reports a glucose estimate repeatedly over time. A finger-stick meter uses a blood sample. Glucose in the two fluids can change at different times, so the readings may diverge when levels are rising or falling quickly. The useful distinction is between a trend over time and a point measurement from a different sample. NIDDK’s CGM guide and Dexcom’s explanation of sensor and meter readings.
Over-the-counter access also has a scope. In 2024, the FDA cleared the first OTC CGM, Dexcom Stelo, for adults 18 and older who do not use insulin. The FDA noted that it was unsuitable for people with problematic hypoglycemia. The clearance describes a specific product and intended population. Check the labeling for the device you’re considering. FDA clearance announcement.
Optical wearables use a different signal
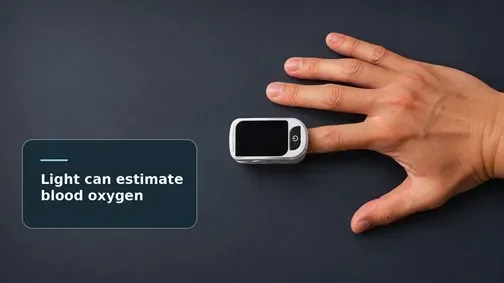
A fingertip pulse oximeter shines light through tissue to estimate oxygen saturation and pulse. Its accuracy can be affected by factors including poor circulation and skin pigmentation. The FDA also distinguishes a watch app displaying data from an authorized CGM from a watch or ring claiming to measure glucose on its own. The agency warns against using a watch or ring that claims to measure glucose on its own without piercing the skin. FDA pulse oximeter guidance and FDA smartwatch and ring safety communication.
Sweat sensors are an active area of research
Gao and colleagues reported a wearable prototype that tracked glucose, lactate, sodium, and potassium in sweat during exercise. It showed that several chemical readings could be collected together on the body. The study measured sweat. Using a sweat reading to estimate a blood concentration would require separate validation against paired blood measurements across the intended users and conditions. Gao and colleagues’ original study.
How to judge a biosensor claim
Start with a sentence you can verify. “It measures glucose in sweat during exercise” gives you a target, sample, and condition to check. “It knows your metabolic health” leaves all three unclear. Then look for evidence that matches the specific version of the device, the people or samples tested, and how you plan to use it.
A worked example of why the sample matters
Imagine a prototype designed to measure glucose in a beverage. A reference method gives 5 and 10 grams per liter in two samples. The prototype reads both correctly in a clean calibration solution, but reads 7 and 12 grams per liter in beverage samples with those same reference values. These are invented numbers for illustration.
Reference result | Clean solution reading | Beverage reading | Beverage error |
5 g/L | 5 g/L | 7 g/L | +2 g/L (+40%) |
10 g/L | 10 g/L | 12 g/L | +2 g/L (+20%) |
The absolute error is the same in both cases, but it is twice as large in percentage terms at the lower concentration. The surrounding sample, called the matrix, can change the response. The example doesn’t identify what caused the error or show that all beverages would behave the same way. A convincing validation would use more samples, repeat measurements, and compare the results across the intended range.
Check the device and the software together
Also separate the sensor from the system around it. A disposable strip is where recognition happens, but a handheld reader supplies power and displays the result. A wearable might send signals to a phone, where an app plots readings, flags missing data, or shows trends. A new app display may make results easier to interpret while leaving the underlying measurement unchanged. When comparing devices, ask which component was tested and whether the results apply to the full setup you would use.
For a one-time test, check the specified reading window. For a continuous system, ask how long it takes before it starts reporting and what happens if a signal drops. That difference matters when you are trying to capture a brief event rather than a daily trend.
Four checks to run before you trust the readout
1. Identify the measured quantity. Ask what contacts the sensor and which value is measured directly or inferred. If a device uses machine learning to estimate a value, ask whether it was validated in people or samples separate from those used to develop the model.
2. Ask what it was compared against. Look for a reference method, the sample count, and errors across the usable range. The detection limit describes how little can be distinguished from background under stated conditions. Sensitivity describes how much the signal changes for a given change in concentration. Selectivity tells you how well the sensor distinguishes its target from other substances.
3. Look for failures and missing data. Ask how the device flags poor contact, warm-up, or a dropped signal. For wearables, check whether the app distinguishes a gap from an actual reading. A smooth curve can hide a period without measurements.
4. Match the evidence to the intended use. Separate a prototype paper, an independent evaluation, and the labeling of a specific medical device. If you use AI to summarize a study, check its sample and reference method against the paper. Our source-check exercise illustrates how a change in measurement can distort an apparent trend. Our Scite guide covers one way to find later papers that discuss or challenge an earlier result.
Keep reading


Colette Kress and Nvidia’s Future After Jensen Huang
Colette Kress takes over Nvidia at a critical point in the AI buildout. Her record shows how she may handle the Rubin rollout and Nvidia’s growing exposure to customer financing.


Jensen Huang Resignation: Why He Left NVIDIA and Who Takes Over
Jensen Huang has stepped down as NVIDIA’s CEO. Here is what is known about the intelligence inquiry, workplace report, and interim successor Colette Kress.
What Is Humanoid Robot Design?
Humanoid robot design is the engineering of a robot with a humanlike body or upper body. It brings together a frame, movable joints, sensors, power, and control...