






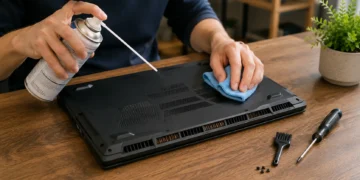
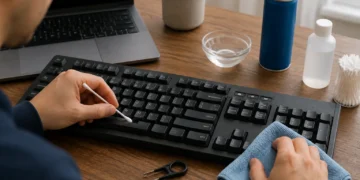


how to clean laptop fan is one of the most useful maintenance tasks you can learn if your laptop is getting loud, hot, slow, or shutting down during heavy use. Dust builds up inside laptops over time, especially around the fan, vents, and heatsink. When airflow gets blocked, the fan has to work harder, the laptop runs hotter, and performance can drop.
The good news is that many laptop fan problems can be improved with safe surface cleaning and careful compressed air cleaning. The risky part is opening the laptop without knowing what you are doing. Some laptops are easy to open. Others have fragile clips, hidden screws, glued parts, or warranty concerns.
This guide explains how to clean a laptop fan safely, when you can do it without opening the laptop, when deeper cleaning makes sense, and what mistakes to avoid.
What Does a Laptop Fan Do?
A laptop fan moves hot air away from the processor, graphics chip, and internal components. It works with a heatsink and vents to keep the laptop within a safe temperature range.
When the fan and vents are clean, air can move properly. When dust blocks the airflow, heat stays trapped inside the laptop. That can lead to fan noise, overheating, lower performance, random shutdowns, and shorter hardware life.
A dirty fan does not always mean the laptop is broken. It often means the cooling system needs cleaning.
How Do You Clean a Laptop Fan?
To clean a laptop fan, shut down the laptop, unplug the charger, remove any external devices, place the laptop on a clean surface, and use short bursts of compressed air through the vents to loosen dust. Hold the compressed air can upright, avoid spinning the fan too aggressively, and let dust escape from the exhaust vents.
For deeper cleaning, you may need to remove the bottom cover, hold the fan still, blow dust out of the fan and heatsink, and gently remove dust with a soft brush. If you are not comfortable opening the laptop, use external cleaning only or take it to a repair technician.
Key Takeaways
- Clean your laptop fan if the laptop is noisy, hot, slow, or shutting down under load.
- Always shut down and unplug the laptop before cleaning.
- Use compressed air in short bursts, not long continuous sprays.
- Do not spray liquid cleaner into the vents.
- Do not use a household vacuum directly on the laptop internals.
- If you open the laptop, hold the fan still while cleaning to avoid overspinning it.
- Deep cleaning may void warranties on some models.
- If the laptop still overheats after cleaning, it may need new thermal paste, fan replacement, or professional repair.
Related Contents:
How to Fix Sticky Keyboard Keys
Signs Your Laptop Fan Needs Cleaning
A laptop fan usually needs cleaning when heat and noise become noticeable. Dust buildup often gets worse slowly, so you may not notice it until the laptop starts behaving differently.
Common signs include:
- Fan runs loudly even during light tasks
- Laptop feels hot near the keyboard or bottom panel
- Airflow from vents feels weak
- Laptop slows down during gaming, editing, or multitasking
- System shuts down unexpectedly
- Battery drains faster than usual
- Fan makes rattling or grinding sounds
- The laptop gets hot while charging
- You see dust around the vents
- The laptop is older and has never been cleaned
If the fan makes a clicking or grinding sound, dust may not be the only problem. The fan bearing may be worn or damaged.
What You Need Before Cleaning a Laptop Fan
You do not need many tools for basic cleaning. Keep it simple and safe.
| Tool | Purpose | Recommended? |
| Compressed air can | Blows dust from vents and fan area | Yes |
| Microfiber cloth | Wipes exterior dust | Yes |
| Soft brush | Loosens dust gently | Yes |
| Small screwdriver set | Opens bottom cover if needed | Only for deep cleaning |
| Plastic pry tool | Helps open some laptop panels | Useful but optional |
| Anti-static wrist strap | Reduces static risk when opening laptop | Useful |
| Cotton swabs | Cleans accessible dust areas | Yes, used gently |
| Isopropyl alcohol | Cleans exterior grime, not fan internals | Limited use |
| Vacuum cleaner | Can create static or overspin fan | Avoid direct use |
For most people, compressed air and a microfiber cloth are enough for the first attempt.
Safety First: What to Do Before You Start
Before cleaning the laptop fan, prepare the device properly.
- Shut down the laptop fully.
- Unplug the charger.
- Remove USB devices, memory cards, and accessories.
- If the battery is removable, remove it.
- Let the laptop cool down for 10 to 15 minutes.
- Move to a clean, dry, well-lit workspace.
- Avoid carpeted areas if you plan to open the laptop.
- Keep screws organized if you remove the bottom cover.
Never clean the fan while the laptop is running. Never spray liquid into the vents. Never force open a laptop panel that feels stuck.
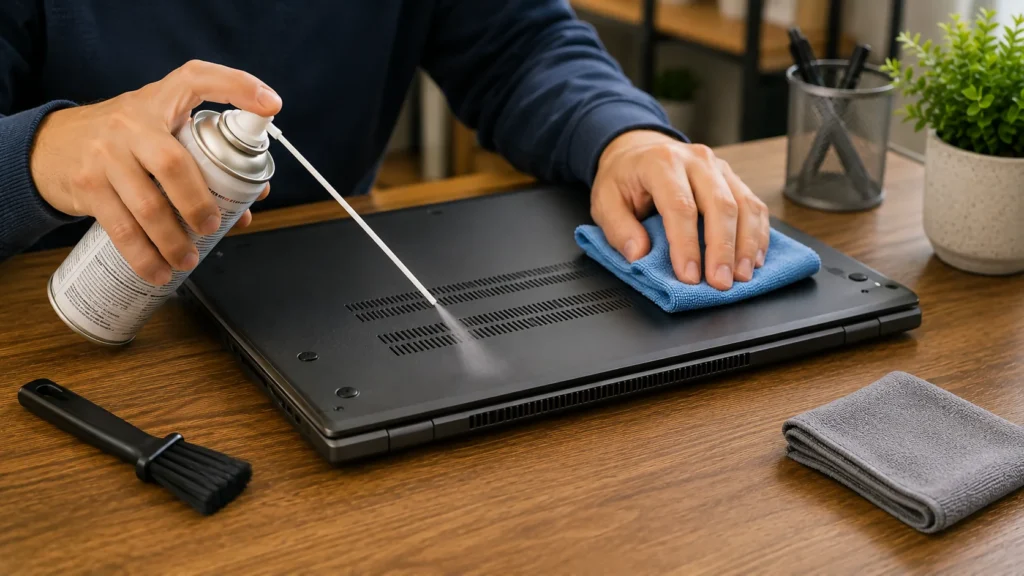
How to Clean Laptop Fan Without Opening It
This is the safest method for most users. It will not remove every bit of dust, but it can improve airflow and reduce noise.
Step 1: Find the Intake and Exhaust Vents
Look around the sides, back, and bottom of the laptop. Most laptops pull air in from the bottom and push hot air out from the side or back.
Common vent locations:
- Bottom panel
- Left or right side
- Rear hinge area
- Back edge of gaming laptops
- Small grille near the fan area
Knowing where air enters and exits helps you clean more effectively.
Step 2: Hold the Laptop at an Angle
Hold the laptop slightly tilted so dust can escape. Do not shake it hard. A gentle angle helps loosened dust move out of the vents.
Step 3: Use Short Bursts of Compressed Air
Hold the compressed air can upright. Use short bursts into the vents.
Do this:
- Spray for 1 to 2 seconds at a time.
- Move between different vent openings.
- Let dust come out naturally.
- Keep the nozzle a small distance away.
- Avoid long sprays that create moisture.
Do not hold the spray continuously. Compressed air cans can release cold moisture if used incorrectly.
Step 4: Clean the Exterior Vents
Use a soft brush or microfiber cloth to remove dust stuck around the vent grille. Be gentle. Do not push dust deeper inside.
Step 5: Let the Laptop Sit for a Few Minutes
After cleaning, wait a few minutes before turning the laptop back on. Then test fan noise and airflow.
This method is best for light dust buildup. If the laptop is still overheating, deeper cleaning may be needed.
How to Clean Laptop Fan With Compressed Air
Compressed air is the most common tool for laptop fan cleaning, but it needs to be used correctly.
Best practices:
- Keep the can upright.
- Use short bursts.
- Do not place the nozzle directly against the vent.
- Clean from several angles.
- Avoid spinning the fan too fast.
- Do not shake the can while spraying.
- Stop if liquid comes out.
The fan should not spin like a turbine. If you can access the fan after opening the laptop, hold the fan blade still with a plastic tool or cotton swab while blowing air through it.
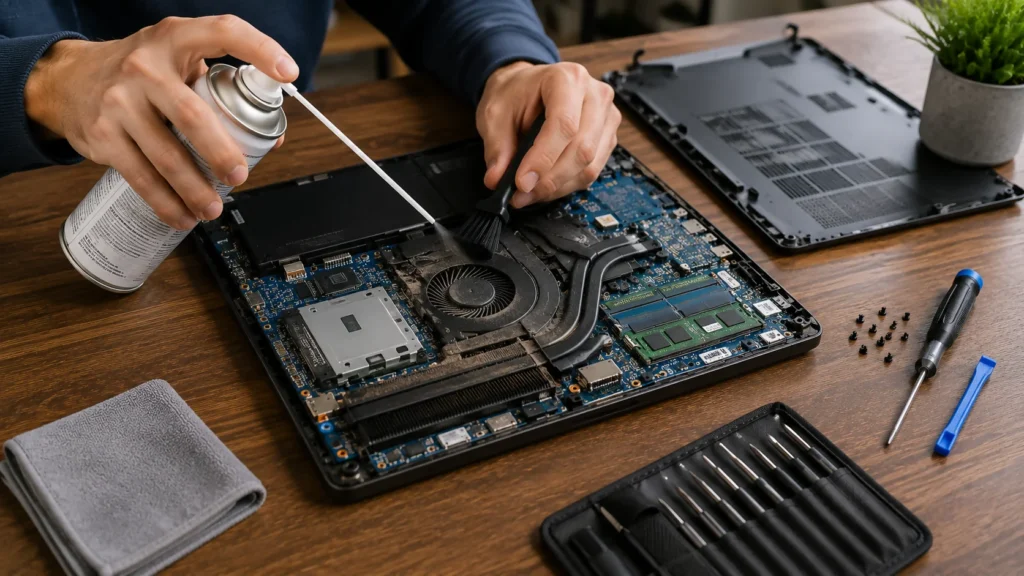
How to Clean Laptop Fan by Opening the Laptop
Only open your laptop if you are comfortable with small electronics. If the laptop is new, expensive, under warranty, or difficult to open, professional cleaning may be safer.
Step 1: Check the Laptop Model
Search for your exact laptop model and bottom cover removal guide. Different laptops open in different ways.
Look for:
- Screw locations
- Hidden screws under rubber feet
- Plastic clips
- Battery cable location
- Fan location
- Warranty seal warnings
Do not guess. Laptop covers can crack if forced.
Step 2: Remove the Bottom Cover
Use the correct screwdriver. Place screws in order because some may be different lengths.
If the cover does not lift easily, do not force it. Use a plastic pry tool, not a metal knife or screwdriver.
Step 3: Disconnect the Battery if Possible
If the internal battery connector is easy to access, disconnect it before cleaning. This reduces risk while working inside the laptop.
Do not pull hard on battery cables. If you are unsure, skip deeper work and use external cleaning only.
Step 4: Hold the Fan Still
Before using compressed air inside the laptop, hold the fan still with a cotton swab or plastic tool. This prevents the fan from spinning too fast.
Overspinning the fan can stress the bearing or create electrical risk.
Step 5: Blow Dust Out of the Fan and Heatsink
Use compressed air in short bursts. Aim air through the fan and heatsink fins so dust exits the vent.
The heatsink is often where dust forms a thick mat. If you only clean the fan blades but ignore the heatsink, overheating may continue.
Step 6: Use a Soft Brush for Stubborn Dust
Use a soft brush to loosen dust around the fan blades and vents. Be gentle around cables and connectors.
Avoid touching the motherboard more than necessary.
Step 7: Reassemble the Laptop
Reconnect the battery if you disconnected it. Put the bottom cover back on. Reinstall screws in the correct positions.
Turn the laptop on and check:
- Fan noise
- Airflow
- Temperature
- Performance
- Any warning messages
If the fan does not spin after reassembly, shut the laptop down and check that nothing is blocking the fan.
How to Clean Laptop Fan on a Gaming Laptop
Gaming laptops collect dust faster because they use stronger fans and run hotter under load. They often have larger vents, multiple fans, and bigger heatsinks.
For a gaming laptop:
- Clean vents more often.
- Use compressed air carefully.
- Check both fans if the laptop has two.
- Make sure the laptop has space underneath for airflow.
- Use a cooling stand if needed.
- Monitor temperatures during gaming.
- Consider professional cleaning once a year if heavily used.
If a gaming laptop still runs hot after fan cleaning, dried thermal paste may be part of the problem.
How to Clean Laptop Fan on a MacBook
MacBooks are compact and can be less beginner-friendly to open than many standard laptops. Some models require special screwdrivers and careful handling.
For a MacBook:
- Start with external vent cleaning.
- Use compressed air lightly.
- Do not spray directly into ports.
- Do not use liquid near the keyboard or vents.
- Check your warranty or AppleCare status before opening it.
- Consider professional service for deeper cleaning.
Older MacBooks with accessible bottom covers may be easier to clean than newer models, but exact steps depend on the model.
What Not to Do When Cleaning a Laptop Fan
Avoid these mistakes:
- Do not spray water or household cleaner into vents.
- Do not use a hair dryer.
- Do not use high-pressure air compressors.
- Do not spin the fan aggressively with compressed air.
- Do not open the laptop with metal tools if you can avoid it.
- Do not remove the heatsink unless you know how to reapply thermal paste.
- Do not touch the motherboard with wet hands or cleaning fluid.
- Do not run the laptop while cleaning it.
- Do not ignore grinding fan sounds.
A careful cleaning can help. A rushed cleaning can damage the laptop.
How Often Should You Clean a Laptop Fan?
Most people should clean laptop vents every 3 to 6 months. Deep internal cleaning may be needed every 12 to 24 months, depending on use and environment.
Clean more often if:
- You have pets
- You smoke or vape near the laptop
- You use the laptop on a bed or couch
- You live in a dusty area
- You game or edit video often
- The laptop runs hot every day
- Airflow feels weak
A laptop used on a clean desk may need less frequent cleaning than one used on fabric surfaces.
How to Keep a Laptop Fan Clean Longer
Good habits reduce dust buildup.
- Use the laptop on a hard, flat surface.
- Avoid using it on blankets, beds, or cushions.
- Keep food and drinks away.
- Clean the desk regularly.
- Use a laptop stand for better airflow.
- Keep pets away from the workspace.
- Wipe the exterior vents weekly.
- Store the laptop in a clean bag or case.
- Do not block side or rear vents.
The fan gets dirty faster when the laptop pulls in lint, hair, and dust from soft surfaces.
Why Your Laptop Is Still Overheating After Cleaning
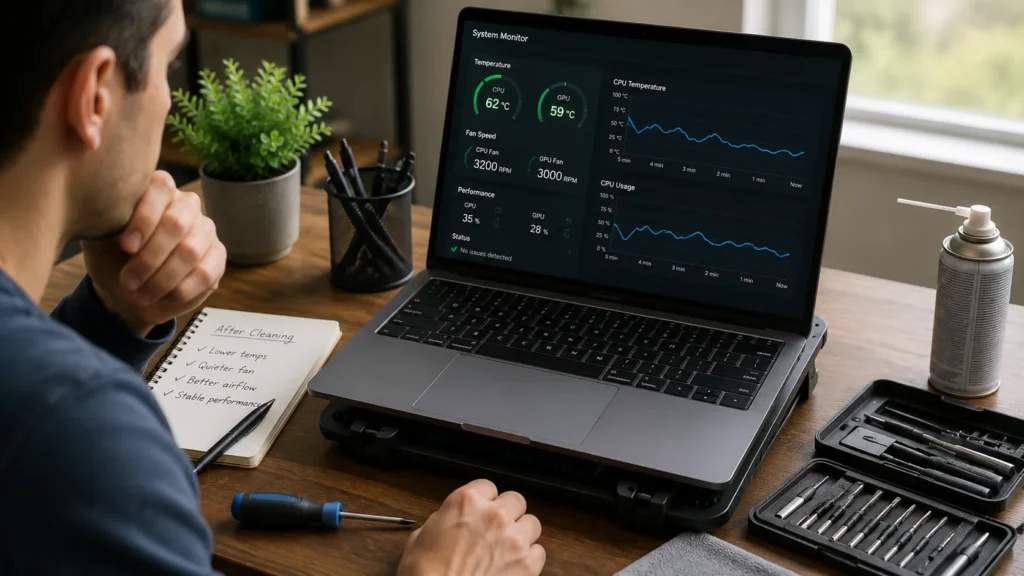
If cleaning the fan does not fix overheating, the problem may be deeper.
Possible causes include:
- Dried thermal paste
- Failing fan motor
- Blocked heatsink fins
- Malware or background apps using CPU
- Poor airflow from blocked vents
- Battery or charging heat
- High room temperature
- Faulty temperature sensor
- Aging hardware
- Heavy software demands
Check Task Manager on Windows or Activity Monitor on Mac to see whether an app is using too much CPU. Sometimes the fan is loud because the laptop is working hard, not because it is dirty.
Laptop Fan Cleaning vs Thermal Paste Replacement
Fan cleaning removes dust. Thermal paste replacement improves heat transfer between the processor and heatsink.
You may need thermal paste replacement if:
- The laptop is several years old.
- Fan cleaning did not reduce temperatures.
- CPU temperature rises quickly under load.
- The laptop shuts down during gaming or rendering.
- The heatsink was removed during repair.
Do not remove the heatsink unless you know how to clean and reapply thermal paste properly. Doing it wrong can make temperatures worse.
Can You Vacuum a Laptop Fan?
It is better not to use a household vacuum directly on a laptop fan or internal components. Vacuums can create static electricity and may spin the fan too fast.
If you use a vacuum near the laptop, use it only around the outside area to collect dust after compressed air blows it out. Do not press the vacuum nozzle into the vents or inside the laptop.
Compressed air, a soft brush, and careful handling are safer.
Best Way to Clean Laptop Fan Without Damage
The safest approach is:
- Shut down and unplug the laptop.
- Clean exterior vents with a soft brush.
- Use short compressed air bursts.
- Avoid spinning the fan too fast.
- Test temperatures.
- Open the laptop only if needed.
- Get professional help if you are unsure.
Safe cleaning is not about being aggressive. It is about improving airflow without damaging small parts.
When to Get Professional Laptop Cleaning
Professional cleaning is worth it when the laptop is expensive, hard to open, under warranty, or still overheating after basic cleaning.
Get help if:
- The fan makes grinding noise.
- The laptop shuts down from heat.
- You spilled liquid inside.
- You cannot open the bottom cover safely.
- The fan does not spin.
- The laptop is under warranty.
- You need thermal paste replacement.
- You see corrosion or internal liquid damage.
A repair shop can clean the fan, heatsink, vents, and internal dust more safely than guessing at home.
FAQs
How do I clean my laptop fan without opening it?
You can clean your laptop fan without opening it by shutting down the laptop, unplugging it, cleaning the exterior vents with a soft brush, and using short bursts of compressed air through the vents.
Can I clean my laptop fan with compressed air?
Yes, compressed air is commonly used to clean laptop fans. Use short bursts, keep the can upright, and avoid spinning the fan too aggressively.
Is it safe to open my laptop to clean the fan?
It can be safe if you know the correct process for your model. However, some laptops are difficult to open, and opening them may affect warranty coverage. If unsure, use external cleaning or professional service.
Can dust make my laptop fan loud?
Yes. Dust can block vents and heatsink fins, forcing the fan to spin faster. This can make the laptop louder and hotter.
How often should I clean my laptop fan?
Clean exterior vents every 3 to 6 months. Deep cleaning may be needed every 12 to 24 months, especially if you use the laptop heavily or have pets.
Can I use a vacuum to clean my laptop fan?
Avoid using a vacuum directly on the fan or inside the laptop. It can create static and spin the fan too fast. Compressed air and a soft brush are safer.
Why is my laptop still hot after cleaning the fan?
The laptop may still be hot because of dried thermal paste, a failing fan, blocked heatsink fins, heavy background apps, or poor airflow. Cleaning helps, but it does not fix every cooling issue.
Should I clean the fan myself or take it to a repair shop?
Clean it yourself if the issue is light dust and you can do it safely. Use a repair shop if the laptop is expensive, difficult to open, under warranty, or still overheating after basic cleaning.
Conclusion
how to clean laptop fan safely comes down to patience, the right tools, and knowing your limits. Start with the simple method: shut down the laptop, unplug it, clean the vents, and use short bursts of compressed air. This alone can reduce fan noise and improve airflow in many cases.
If dust is packed inside the fan or heatsink, deeper cleaning may help, but opening a laptop is not always beginner-friendly. When in doubt, avoid force, avoid liquid, and get professional help. A clean fan can make your laptop quieter, cooler, and more reliable.


